Lingerie sewing supplies inventory

In advance of visiting Kantje Boord with Lauriana this weekend while I’m in Amsterdam to run the marathon, I thought it’d be a good idea to take a full inventory of my lingerie sewing supplies so I could see what I had vs what I needed, and hopefully not make duplicate purchases.

Oh. my. god. I really don’t think of myself as a “stasher” – I try to sew what I’ve got and keep it all fitting within the confines of my tiny sewing room, but I seriously have a ridiculous amount of lingerie supplies, and I hadn’t even realised it, because it was all stored in about four different places.

As a confession, here’s what I’ve got:

Elastics:

  • Black picot edge
  • Black ridge edge
  • Round stretch cord (white & black)
  • Medium grey picot edge

Too cold for photos – just sewing instead!

As I write this, London is in the midst of the second snowfall of the year (if you count Monday’s over-hyped yet under-delivered snow, that is) and I’m bundled up in a full-body thin layer of silk (long johns), plus my wool foldover trousers, my bamboo turtleneck, two pairs of socks, and my Russian greatcoat for my 35min walk into work today. It’s nothing on the Pennsylvania winters I grew up with, but at least I feel prepared!*

The good news is that, while it’s freezing outside, my sewing cave is one of the warmest spots on the boat, so I’ve been busy!

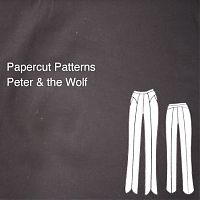
Papercut Peter & the Wolf Trousers

The new trouser pattern from Papercut Patterns was burning a hole in my To Sew list, so I just had to try them out! I finished these before last weekend, but Saturday I was covered in mud (another cross country race) and Sunday it was freezing and I didn’t fancy a photshoot.

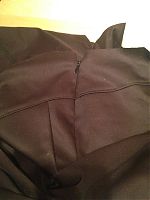
I did an awesome job lining up the seams on the side invisible side zipper, if I do say so myself!

I really like that they have you topstitch all the mid-leg vertical seams as well as all the yoke seams – that topstitching really makes the seaming stand out nicely. It also meant I actually finished a huge 1000m spool of black Gutermann thread! I thought those things were infinite!

I’ve not yet worn these to work (the tulip hems mean my long johns are visible in front, the horror!) but I can tell already they’ve got a nice fit throughout – I especially like the trouser hems and the hip yokes, though they do mean the pockets are placed further down the leg than I’m used to…

I’ll try to get some photos this weekend, even though the details will be lost in the dark brown stretch twill (hey, it was in the stash alright!?) I’d bought in Paris last Spring. I didn’t have any particular attachment to it and it was a stretch woven as per the pattern requirements, so I made these as a trial version (or wearable muslin if you prefer). I might fancy making these again in some stretch wool suiting in my stash from last winter…

Another Chic Sweatshirt

When my parents were visiting in October, my mom looked through all my recent makes and decided she’d like a chic sweatshirt for her belated Christmas gift, and she picked out a lovely lavender sweatshirting for it while she was here. Remember how lovely she looks in lavender? I think it was a great choice. For my gift, she re-taught herself to crochet and made me a wonderful hat in mustard wool I picked out. Hooray for our little skills exchange!

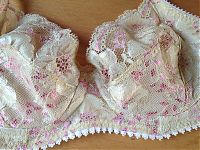
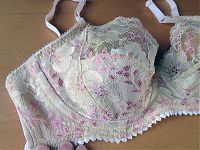
A Yellow Lace Marlborough bra (that fits!)

I have a long and rather conflicted history with bra sewing. I sewed my first bra five years ago, but despite being an accomplished seamstress and having a really standard body shape, I still haven’t managed to sew a single bra that I’m happy enough to wear on a regular basis in the time since.

Until now.
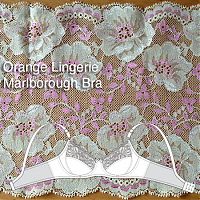
I knew Orange Lingerie had a bra pattern in the works for the better part of a year, and I knew her bra construction book was awesome, and, when I met Norma on her trip to London last year, she gave me bra fitting advice in a restaurant toilet – and still when she finally released the Marlborough bra pattern I was skeptical. That’s just how burned I’ve been by bra patterns in the past.

But I eventually did break down and buy it, with the thought to throw out all my other tweaks, calculations, traced RTW pieces, and just start fresh with this pattern and see where to go from there.

Choosing a size was actually the most difficult part for me – despite being a 34B in pretty much every RTW bra brand ever, the different formulas used to calculate bra sizes online are insane. Various calculation methods have said I’m anywhere from a 40A (Orange Lingerie’s method) to a 34DD (Bra size calculator’s method), both of which are just laughable (and yes, before you tell me to go get sized in person, I’ve done that in the past, and they said I actually am a 34B). So I threw both out and just made my RTW size, a 34B, with no changes.

Before cutting into anything good, I first made a black test version – it’s unlined with unfinished edges, with various bits cut off of old RTW bras, and “plunge” underwires that were a bit too short. But it freaking fit.
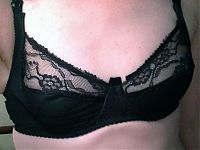
I wasn’t about to get too excited (I’ve been down that road before, declaring I’d perfected bra fit, finally, only to have problems emerge over time and wear). So I wore it for a week or two. And it still fit well. So I cut into the good stuff.

Everything in this pale yellow version is from my (rather extensive) lingerie sewing stash, and I hadn’t remembered until afterwards, but this gorgeous lace was actually a gift from Norma herself, when she came to visit London! You may notice that my straps have an M&S lingerie brand on them, even. Yes, I definitely recycle when the RTW parts are nearly-new and save me some time!
The "Eyelash" black lace bra

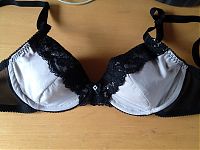
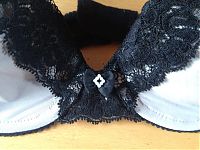
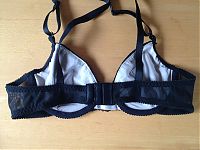
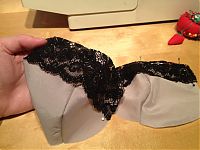
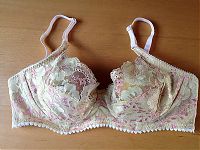
After I completed my world tour, I had four and a half days at home to recuperate, so I of course spent a good portion of that in my sewing cave! The first of my finished garments is this bra, which I’m calling the “Eyelash” one because the layer of black lace on the top just made me think of the bra batting its eyelashes at me!

I used the same self-drafted/traced pattern as my third muslin, but with zero-stretch silk-cotton woven leftover from the slip I made almost exactly a year ago, and some black stretch lace I’ve had in my stash (not the same as I’d used in the slip, but that’s only noticeable if you squint really hard!).

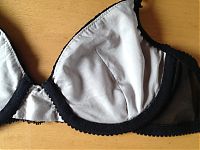
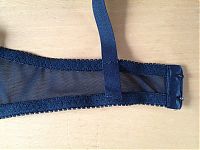
The cups are fully lined and the wings/backs are made from a black power mesh that was in my lingerie sewing stash.

First I made each cups separately (two fronts and two linings). Then I basted the lace across the fronts and joined the fronts to the linings along the top edge. I could’ve then topstitched, but I opted to understitch instead, then basted around the other edges so the fronts and linings could then be treated as one for the rest of the construction.

Here you can see the cups as I was constructing them. You can see that the lace is hanging free, only really attached at the top edge, and for an inch or so at the sides. I carried on the lace motif over the bridge so it looks fairly seamless from afar.

The Most Beautiful Bra in the World

…is one that finally fits after days and days of muslins and tweaks!

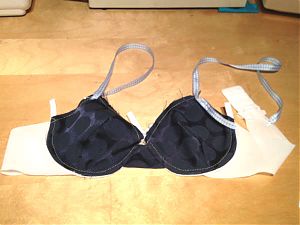
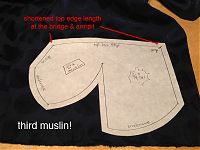
You see, this is the third muslin of my latest attempt to sew a Bra That Actually Fits and I think I’m finally happy with this one.

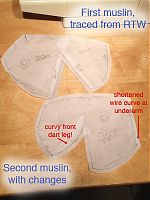
I started off by tracing a well-fitting RTW bra and I sewed up a muslin of it according to the fabulous instructions in Demystifying Bra Fitting and Construction. From that, I could see that the bottom of the bra cup was too long for my underwires, and, as I suspected, the straight legged dart was too pointy and I needed some room in front of it, so I made the front leg curved.


Apologies that the orientations are opposite between the two!)

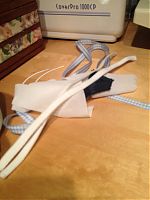
Then I ripped out the basting stitching of my muslin, sewed up new cups according to the second cup pattern, and reused all the other pieces from the muslin that were absolutely fine, namely the wings, bridge, straps (gingham ribbon here!), and underwire channels:

The cup shape of the second muslin seemed good (though it’s hard to be subjective in the mirror and selfies), but I had a bit of excess fabric along the top edge of the cup that needed pinching out. I didn’t want to create a dart at the top edge as I eventually want to make this bra from lace, so Norma suggested I take it out from the sides (bridge & underarm), making sure those lengths didn’t change as I did so.