Copying a favourite bra

You may have noticed that one of the items on my Spring Sewing Ideas list was a “self-drafted/copied from RTW” bra. I’ve sewn countless bras before, but really only been happy with the fit and look of one (a foam cup muslin, of all things!). I really want to try and get away from moulded foam cups for a number of reasons (which Orange Lingerie discusses here), so my dream bra drawer would be entirely lacey, gorgeous, self-made, frameless, underwired bras, with one nude moulded foam cup bra for when I really need a seamless look.

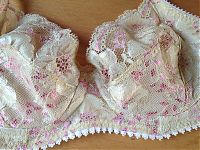
The problem is, I’d been buying foam cup bras for so long that I didn’t really have any non-padded ones I could clone, and on a whim last year, I bought a few M&S bras and was amazed to find that two (identical, apart from colour) all-lace, single-darted, frameless, underwire bras, fit me perfectly and gave me a great shape.

So in the back of my mind I’ve been wanting to clone these, since my last bra using the Elan pattern ended up fitting well (at first I thought I’d cracked it finally!!), but the cup shape looked B-A-D. Boobs like duck-bills, oh god no!

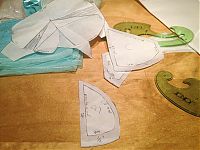
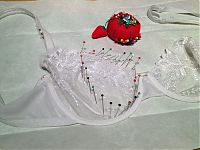
Anyway, so I started the process of cloning the white version of the M&S bra last night, by using my method of tracing patterns – placing the bra down on top of paper and running my serrated tracing wheel around it. This worked well for the band, but I wasn’t convinced I got an accurate trace for the cup, so I looked up an old Threads article, “Clone Your Favorite Bra” (Issue 99, Feb/March 2002 if you’ve got the archive DVDs), which suggested stabbing lots of pins around the bra edge until you got to a point where it would no longer lie flat. Then you unpin the first pins you put down, and re-shift everything using the latter pins (in my case, along the dart) as an anchor so it lies flat and you get all the edges pinned.

Then, in my case, because the dart stayed in place and everything shifted around it, I had to cut through the dart and open it back up. Because the top edge of mine was the lace edge, I knew this had to be straight, so it made it easy to re-adjust.

A Yellow Lace Marlborough bra (that fits!)

I have a long and rather conflicted history with bra sewing. I sewed my first bra five years ago, but despite being an accomplished seamstress and having a really standard body shape, I still haven’t managed to sew a single bra that I’m happy enough to wear on a regular basis in the time since.

Until now.

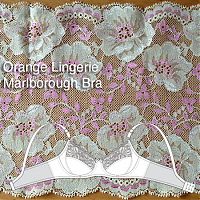
I knew Orange Lingerie had a bra pattern in the works for the better part of a year, and I knew her bra construction book was awesome, and, when I met Norma on her trip to London last year, she gave me bra fitting advice in a restaurant toilet – and still when she finally released the Marlborough bra pattern I was skeptical. That’s just how burned I’ve been by bra patterns in the past.

But I eventually did break down and buy it, with the thought to throw out all my other tweaks, calculations, traced RTW pieces, and just start fresh with this pattern and see where to go from there.

Choosing a size was actually the most difficult part for me – despite being a 34B in pretty much every RTW bra brand ever, the different formulas used to calculate bra sizes online are insane. Various calculation methods have said I’m anywhere from a 40A (Orange Lingerie’s method) to a 34DD (Bra size calculator’s method), both of which are just laughable (and yes, before you tell me to go get sized in person, I’ve done that in the past, and they said I actually am a 34B). So I threw both out and just made my RTW size, a 34B, with no changes.

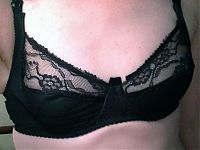
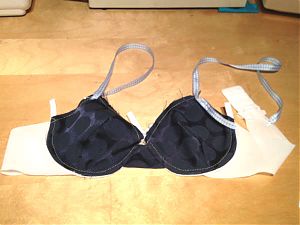
Before cutting into anything good, I first made a black test version – it’s unlined with unfinished edges, with various bits cut off of old RTW bras, and “plunge” underwires that were a bit too short. But it freaking fit.

I wasn’t about to get too excited (I’ve been down that road before, declaring I’d perfected bra fit, finally, only to have problems emerge over time and wear). So I wore it for a week or two. And it still fit well. So I cut into the good stuff.

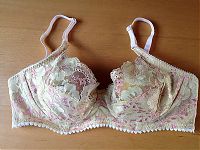
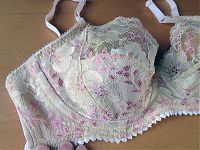
Everything in this pale yellow version is from my (rather extensive) lingerie sewing stash, and I hadn’t remembered until afterwards, but this gorgeous lace was actually a gift from Norma herself, when she came to visit London! You may notice that my straps have an M&S lingerie brand on them, even. Yes, I definitely recycle when the RTW parts are nearly-new and save me some time!

Book Review: Demystifying Bra Fitting & Construction

While I’m away on holiday I thought I’d keep you all entertained with a series of posts on books I’ve bought over the past year or so and never really quite talked about. Not a single one of them is a “beginning sewing book”, either, so for those of you who are a bit sick of seeing the same books being released over and over, well, you’re in for a treat this week.

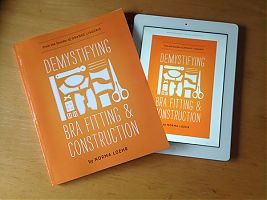
First up is a book which I talked about a while back when it was released as an e-book, but I thought it was worth a revisit as it’s just been released in print.

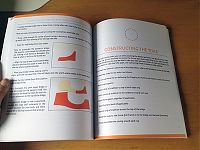
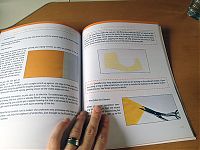
The print edition has the same content as the e-book, with full colour photos and really very excellent advice on both fitting and construction that I just haven’t seen elsewhere, in print or online. If you missed my earlier review, the condensed version is that this is really what you need in order to make a bra pattern fit you, and then sew it all together. I’ve sewn with Kwik Sew bra patterns before and even though their instructions are held up to be really good, it doesn’t even come close to the level of detail in this book.

Plus, she tells you how to make a muslin (toile) so that you don’t get all the way to the end of sewing a gorgeous bra, only to find out in the final step it doesn’t fit properly. Which is what I usually end up doing, and then getting discouraged and not sewing another one for months (speaking of, I’m probably due for another spate of bra sewing soon!)

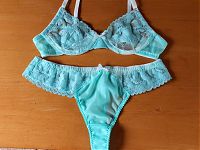
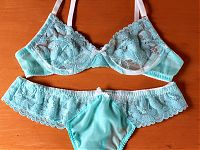
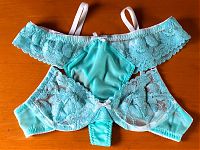
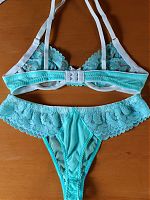
Turquoise lingerie set – bra and Lacey Thong

I arrived home from Mexico and wasn’t particularly filled with sewing mojo, to be honest, but happily this was short-lived, because I saw that Pattern Review had announced a short, two week Lingerie Sewing Contest for the second half of October! This was just what I needed to kick me into action and remind me that I’d been meaning to alter the seaming on my bra cup pattern after I’d made the eyelash bra.

The cups on that one were fine, but I have some gorgeous turquoise lace in my stash from Danglez’ closing down sale (sniff!), and it was too narrow for my one-dart cup pattern. So before I could even start sewing, I had to do some pattern drafting manipulation first – introducing some seam lines to account for the narrow lace, split and rotate the dart around a bit, and voila! Now I’ve got a three part cup!

I was so happy with the fit of this bra that I made myself a matching pair of Lacey Thongs (my free downloadable pattern, if you’d forgotten!) to go with it.

Seriously though – I think this must be about the 8th or 9th bra I’ve sewn, but only about the second I’d wear out of the house. Sewing a bra is easy – getting the bra to fit properly, feel comfortable, and look flattering is beyond challenging. I think I understand other people’s frustrations with trouser fitting now, because this bra fitting journey has been character-building!

My real breakthrough came when I stopped using commercial patterns and just traced existing RTW bras instead. For me, they were a much, much closer starting point than the bizarre cup shapes provided in the KwikSew and Elan patterns I’d previously tried.

The Most Beautiful Bra in the World

…is one that finally fits after days and days of muslins and tweaks!

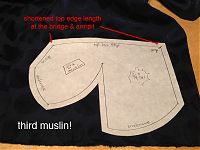
You see, this is the third muslin of my latest attempt to sew a Bra That Actually Fits and I think I’m finally happy with this one.

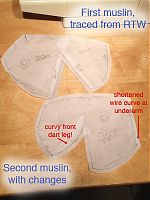
I started off by tracing a well-fitting RTW bra and I sewed up a muslin of it according to the fabulous instructions in Demystifying Bra Fitting and Construction. From that, I could see that the bottom of the bra cup was too long for my underwires, and, as I suspected, the straight legged dart was too pointy and I needed some room in front of it, so I made the front leg curved.


Apologies that the orientations are opposite between the two!)

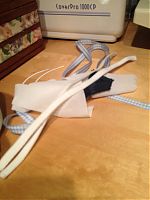
Then I ripped out the basting stitching of my muslin, sewed up new cups according to the second cup pattern, and reused all the other pieces from the muslin that were absolutely fine, namely the wings, bridge, straps (gingham ribbon here!), and underwire channels:

The cup shape of the second muslin seemed good (though it’s hard to be subjective in the mirror and selfies), but I had a bit of excess fabric along the top edge of the cup that needed pinching out. I didn’t want to create a dart at the top edge as I eventually want to make this bra from lace, so Norma suggested I take it out from the sides (bridge & underarm), making sure those lengths didn’t change as I did so.

Interview with Kelli from True Bias

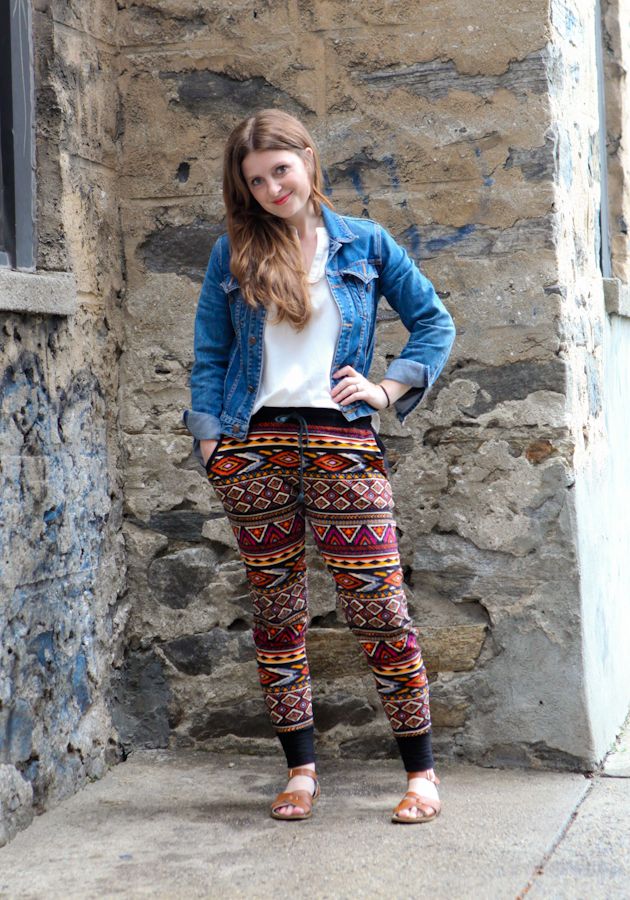
I first heard about True Bias patterns when Kelli released her first pattern last year – the Hudson Pant were an indie sewing phenomenon, and it seemed I was about the only woman who hasn’t sewn a pair yet (and believe me, they’re still on my To Sew List for someday!). I’ve had the privilege of talking to Kelli to find out more about her sewing, aesthetics, and what’s up next, so read on to find out more about the lady behind the label… – melissa


Kelli in her Hudson Pant pattern

You kept a sewing blog for quite a few years before starting True Bias – what was the impetus for starting a pattern company?

Yes, I started my blog about 3 1/2 years ago. When I started it, I always knew that it would somehow turn into a business for me, I just wasn’t sure in what way. I was new to motherhood, having an identity crisis, and needed something to work towards. I was passionate about sewing and the community, so it made sense to focus my efforts there. I entertained the idea of a fabric store for awhile but it didn’t stick. I knew of a few independant pattern companies at the time and loved what they were doing. I had taken a couple of patternmaking and draping classes in college, but I knew that I didn’t have the skills yet to start a company. It wasn’t until after moving to NYC and starting classes at FIT that my confidence and abilities grew. My first pattern, the Hudson pant, was a huge leap of faith for me. And it was super slow at the beginning and scary. I wasn’t sure that this was all going to work, but it did and I am so glad.

What’s the single biggest lesson you learned so far?

Don’t worry about what other people are doing, just be true to yourself. This is SO hard though. The indie pattern market has become very saturated and we are all influenced by the same trends to one extent or another. This means there is going to be some overlap. There have been multiple times when I have seen a sneak peek on instagram of another designer’s pattern and I have had a total freakout because it looks similar to something I have been working on for months. It’s scary because you don’t want it to appear that you are copying, but in the end you have to be true to yourself and your own ideas. Like I said, it’s really hard though.

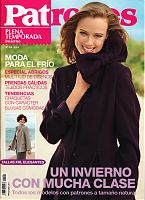
Patrones 299, 300, 301, and Costura Facil

I ordered these from a new-to-me Spanish magazine shop, No Pares de Leer. The prices (and shipping) were about the same as Hos Hanne, but the shipping was tracked by default so I could see exactly how slowly it was making its way to me…

Patrones 299

This is the last of the winter issues (sob!), but at least it’s full of what Patrones do best – coats!! I even like the coat on the cover, though I like it better without the enormous bow.

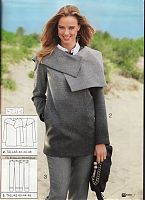
In the first coats feature (on that “Patrones beach” we’ve seen in pretty much every issue), I rather like this big, asymmetrical collar coat, but it does remind me of the Vogue Armani-knockoff pattern so many people have made (and I’ve loved, too).

This topstitched, seamed jacket just oozes cool. The detailing is just fantastic on this, too – they even added a little pouch to the belt!