Pattern matching

I should have some photos for you very soon of my beautiful silk blouse, but in the meantime, I’ve started thinking about sewing up my next pair of jeans, using some brand name Levis 3% lycra denim from Crybaby’s Boutique (though it appears to be sold out now!). It’s all washed and dried (in my neighbour’s tumble dryer) and pressed and ready to go, but now I have to decide whether I’ll stick with my tried and true jeans pattern, Burda World of Fashion 08/2006 #109, or whether I should a new pattern, BurdaStyle’s Anita skinny jeans pattern.

So my first thought was to compare the two patterns to see exactly how different Anita is from my usual pattern. It fits me like a glove, but has back darts rather than a yoke, which is my only aesthetic issue with it. Now, the BWOF pattern (in brown paper) does not have seam allowances and Anita (in white paper) does, so if the two patterns were exactly the same there should be 5/8 inch of white showing all the way around the edges.

Here’s the waistband pieces:

A sunny bamboo top and matching headband

I don’t buy fabric very often, but I recently fell headfirst into a few sales of shops which stock one of my all-time favourite fabrics, bamboo jersey! So my stash has been replenished and you can expect to see quite a few bamboo jersey garments over the next few months. But first to hit my machine was some sunny yellow bamboo jersey from Lamazi Fabrics. The “mustard” colourway appears to be out of stock now but they have some other colours in the Allure bamboo jersey range.

I absolutely love wearing the bamboo teeshirts I’ve made over the years so I only bought 1m, thinking I’d probably just want to sew a standard teeshirt again. But I had been tempted by the unique, pleated sleeves on the Forget Me Not Patterns “Iris Tee” since it came out, and I thought it might be a nice way of adding a bit of flair to an average tee.

A matching silk hardshell clutch

When I make a nice dress for a formal occasion, I often like to create a small handbag to match the dress (or jacket!) as it just creates a more “pulled together” look, and it’s something I can do that RTW often can’t!

So when I was cutting out the silk noile for the Pamela dress you saw earlier this week, I realised I had a small rectangle leftover – perfect for covering one of the U-Handbag hardshell clutch cases I’d bought!

All the clutch bags I’d made previously had been sewn (a favourite being the Cake patterns wristlet), so a hardshell case involving lots of glue was totally new territory for me! Luckily, Lisa provides really great, printable instructions for these, and honestly, it was SO easy to make!

A matching green Cake clutch bag

Wow, what a busy week last week! Thank you all so much for your support and orders of my new VNA Top pattern (remember you can still get 10% off everything by using code “LASEREYES”)! The big wedding I was attending was actually last weekend, but I was so swamped I’m only just able to share these details with you now…

Remember the green cropped blazer I’d sewn for the wedding? I’d shown you how it looked with casual clothes, but I can now show you how I wore it on the day, along with the dress I’d planned it around:

You can really see how the green piqué works alongside the texture of the dress in this closeup shot I took in the car on the way to the wedding…

And you can also see that I did indeed manage to sew up a matching Cake Patterns Red Velvet Clutch from the same fabric and lining as my jacket! The whole look was a success, IMHO, and the chilly evening meant I kept my jacket on almost the whole night, only taking off my jacket (and exposing my bare back in the dress) when we hit the dance floor.

Pattern drafting gadgets (plus discount code!)

I had the final instalment of my Pattern Magic course at Morley College over the weekend (more on that later this week!), and since the majority of the class is in pattern drafting, it became apparent to me that I’ve got three pattern drafting gadgets in my arsenal that aren’t widely known, but that I consider to be essential!

On the left is the Seam Allowance Guide, little magnets which snap onto the side of your scissors to help you cut an even distance away from your line. I usually use this when cutting my fabric when using patterns that don’t have seam allowances at all, my on my course it was very helpful when cutting out the final pattern when I didn’t want to draw the seam allowances in. I got mine for review a while back but you can buy yours here.

On the bottom – I don’t know the technical name for this, but I call it my “pizza wheel measurer”. It’s a little wheel marked in centimetres which allows you to measure curves really easily. I use it most often when matching up seam lengths between sleeve caps and armscyes, but there are a number of occasions in the Pattern Magic books where you need to ensure two curved seam lines are the same length.Claire posted instructions on how to buy these from Japan a while back.

On the right – The newest member of my pattern drafting team is the SA Curve ruler – a narrow ruler with one straight edge and one curved edge. It comes in two widths – 5/8” (1.5cm) or 3/8” (1cm) and the idea is that you place the ruler along your seam line and then just trace the other side of it, et voilà! Your seam allowance is added on.

Vintage wiggle dress – pattern notes

My latest project is this vintage sheath dress from the November Burda magazine (which you can purchase as a pdf here if you missed the magazine)!

It’s a reprint of an original pattern Burda printed in 1956, and one of my favourite running features that Burda magazine have been doing this year. Since the company’s had a very long history, it makes sense that they should look into their archives, dust off a few gems, grade up the sizing to their usual modern range, and translate the instructions!

Contrary to popular belief, this particular one is not a maternity dress, despite the fact that the model clearly looks like she’s “showing”. I can assure you that I do not look pregnant in it one bit, so let’s move on with the catty remarks…

In any case, I finished this one on Sunday night, but considering that it gets dark at 4pm here now, I won’t be able to do a photoshoot until this weekend, meaning you won’t see it on me until next week. By which time I’ll have probably forgotten all the construction details, boo!

So by way of a reminder, I thought I’d type up my thoughts now, then you’ll see the finished design next week. So the “Tell”, then the “Show”!

1. The bodice has seven monster, curved darts, all of which needed to be accurately marked onto the fabric. If you have carbon paper, I suggest you make good use of it, but for me, I remove the inside of the darts with scissors, then thread trace each dart with silk basting thread so I can see it on both sides. Then repeat for the other bodice piece. This took a few evenings, but it was important to get them right, as it’s the focus of the entire dress!

A seafoam green Ruby Slip (and matching panties)

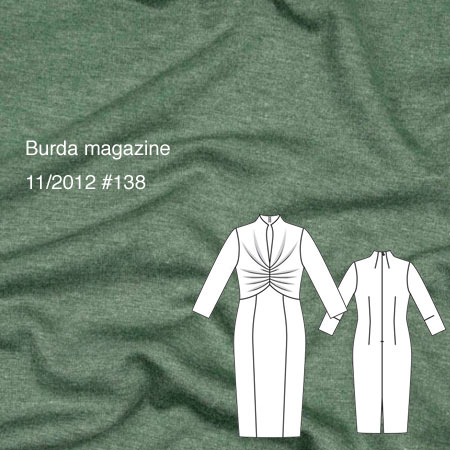
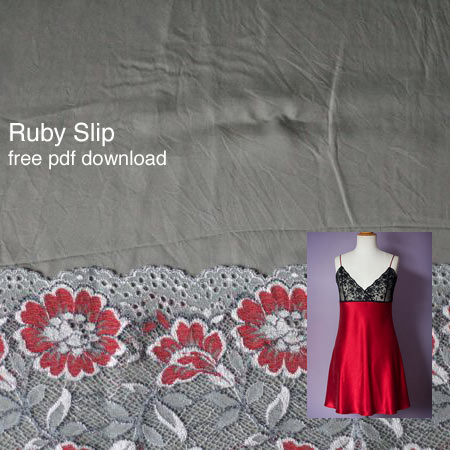
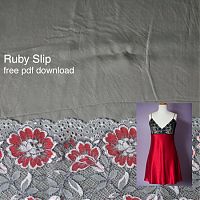
The Ruby Slip is a free pdf pattern and comprehensive set of tutorials over at Pattern Scissors Cloth, and as soon as I saw it, I knew it was just the most perfect pattern ever for me and I had to sew it ASAP!

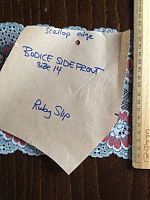
I had 2m of seafoam green silk in my stash that I’d bought at Bhopal Fabric on Brick Lane over the summer (at £6/m), so I took a swatch of that along with me to MacCulloch and Wallis just before Christmas to buy lace specifically for this. Their lace selection isn’t great, but I totally fell in love with this stretch lace, made up of seafoam green, grey, and brick-red flowers, and it was the required 18cm for the pattern. It was pretty eye wateringly-expensive at £14/m, but I ended up with a silk matching lingerie set for £40 exactly, so I think the economics of my decision were sound.

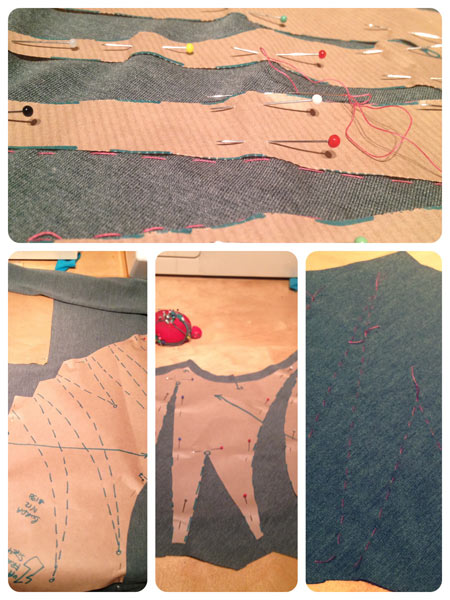
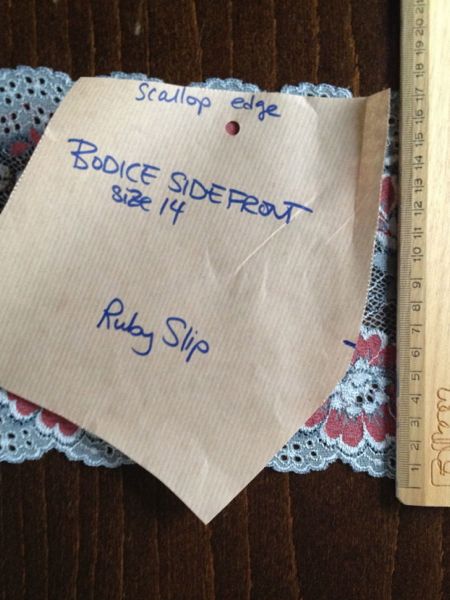
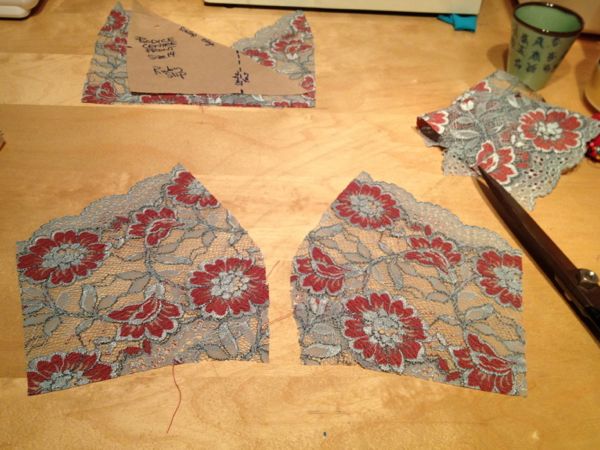
Sherry has done an incredible job going through all the ins and outs of lace cutting, bias silk sewing, how to do an FBA, etc, but I did get a surprise when I found that 18cm lace is not wide enough for the side front:

Since I went out and bought the lace specifically for this, I was a little annoyed, but I was also feeling flu-ish so I sat down with my copy of Bridal Couture and hand-pieced some lace from my scraps to make up the missing corner. It involved a ton of tiny hand stitches in both seafoam and brick to get everything to match seamlessly, but I’m pleased with the end result (she’s since posted some ways of dealing with narrow lace).

I also wanted to demonstrate how much you need to pay attention which cutting lace. I was paying heed to all of the scallops in order to get them in join up nicely at the seams, but I totally didn’t see that my motif was off at first. Happily, I had enough to re-cut that piece to have a nicer join over the seam (seen on the right).

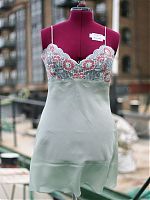
Right, all that aside, and let’s see some finished photos! But, er, not modeled on me since there’s see-through lace and I’m not an exhibitionist. So you’ll just have to take my word that I squealed with delight when I first tried this on, because the fit is just perfect! The bias skirt really just hugs my curves without being tight, and everything just fits like it was meant to be. I made the “short” version, and the hem lies about 3-4 inches above the knee, which is perfect for me.

Upcoming Fall 2011 sewing – the patterns

It’ll be no surprise to you that I’ve already started on my Fall sewing, since you’ve just heard all about my upcoming trench jacket, but I’ve been thinking about the rest of my Fall sewing ambitions over the last few weeks. Having August temperatures mostly in the 50sF (16-20C) meant that I was mentally ready for cooler weather a long time ago!

I’ve got the fabric for all (but two) of these already, too, so I’m sure to get through a lot of my stash this way, too… Though I did just buy some new fabric in order to make four of these, oops. More on the matching fabric later.

Tricky pattern? Build a paper model first!

After a weekend of tracing patterns and sewing kids clothes (some you’ll see later, but others are Christmas gifts not to be ruined), I finally got a chance this evening to cut out the fabric for the wool jersey top from the latest Patrones, #285, that I wrote about last week:

I came across some gorgeous ex-Prada wool jersey at Ditto Fabrics (you’ll remember them from earlier in the summer when I visited their Brighton shop) and knew I was destined to pair fabric and pattern together! (NB: if you’re planning on making this top with this fabric, buy 2m instead of the 1.5m called for in Patrones as it’s ever-so-slightly narrower than Patrones’s and I had a real tricky time fitting everything into 1.5m!) I also bought some dark turquoise ex-Burberry coating, some I-can’t-believe-it’s-not-silk ex-Prada polyester jersey with trompe l’oiel sequin print, Paul Smith grey marl jersey with stars, and some black stretch denim (all pictured at the bottom of my fabric stash gallery if you fancy a perv!). Honestly, I’m beginning to think the owner Gill is a bit like the UK version of Gorgeous Fabrics, she has such an eye for quality ex-designer stuff!

The funny this about this pattern is that on first glance, it looks like a really easy garment – just a basic blouse with dolman sleeves and some horizontal seaming in the front and back, topped off with a triangular collar with a bit of gathering detail and a covered button. Or so it’d seem. Look a bit closer at the pattern pieces and start chucking bits of the instructions through Google Translate, and it all starts to become a bit more interesting…

Patterns To Trace

Recently I’ve been doing more batch tracing rather than tracing one pattern, sewing it up, then tracing the next. I find my sewing bottleneck is often in the tracing step (even though it doesn’t take much time), so by doing a bunch at once I can always have something on the go to work on in the mornings and evenings.

I’ve been mentally matching up my patterns to fabrics in my stash and tracing an awful lot the last few nights. Here’s what I’ve got coming up in the next few weeks, though you can see my plans have had to change somewhat to focus more on comfortable knits…