KnipMode & KwikSew Lingerie Set

Wow, I’m really falling behind with my photos, it feels like so long ago that I finished all these lacy bits! But then again, I bought the brown and turquoise bra kit from eLingeria.de way back in January 2008 so I suppose a week or so isn’t much in the lifespan of this fabric!

The kits from eLingeria.de give you all the bits you need to make one bra and two panties – really soft, stretchy microfibre, stretch lace, elastic, bra straps, underwire channeling, hooks, and the strap loops and findings. The only thing I needed to buy extra were the underwires, since they’re so size-specific. I really enjoyed sewing these, and having the kit meant I didn’t have to gather all the materials in matching colours on my own, so I’m definitely going this route again. €20 for a matching lingerie set is a steal, even with the current exchange rate!

The bra pattern is KwikSew 3300, which I extensively reviewed when I sewed my first bra toile a few weeks ago, only this time I used the right elastic so it fits!

A black and brown lacey lingerie set (and exclusive freebie!)

I think it was inevitable that I’d need a quick and fun distraction from all my pattern drafting and muslins, and nothing spells “quick” and “fun” like lingerie! Seriously, if you’ve never sewn lingerie, you won’t really understand the appeal, but playing with tiny bits of lace and trim is just so creative and rewarding, especially for ladies like me who really aren’t into embellishment elsewhere in their wardrobes.

Since it fit so well before, I used the same modified bra pattern from my purple hearts bra, though this time I used black, pushup foam cups and the black/brown Alice lingerie kit from The Sewing Chest.

The first step was to cover the cups with the rigid lace. The lace in the kit was 50cm long, with two scalloped edges, so I aligned a scalloped edge along the top of the cup, then pinned and smoothed and made a few needed pleats in order to get it looking nice. If the lace or covering material is stretchy, then you don’t need any pleats in it, but as mine was rigid, a few small pleats were necessary towards the bottom.

Here’s the covered and uncovered cups:

Then I did the same with the other cup, though I had to use the opposite scalloped edge so both cups were symmetrical. In bra making, symmetry is king!!

With a wide zigzag stitch, I basted the lace around all the edges and trimmed the excess. I actually went back later and added some stretched, narrow elastic on the inside of the top of the cups, but I’d recommend actually doing this, or applying FOE (foldover elastic) to the upper cup edge before stretching the lace over your cups to avoid a second line of zigzagging over the lace. Even if you think your cups are sturdy enough to not need the elastic, it really makes a difference in keeping the top of the cup close to your body and not getting any gaping.

A different kind of lingerie success

I’ve made three bras so far, and despite winning the PR Lingerie contest last year, I’ve never been that happy with the fit of any of those bras. I mean, they were okay, but the style is different to the kind of bras I buy, and the underwires dug in, and well, the girls just didn’t look their best. So they’ve kinda worked their way to the bottom of my lingerie drawer, which makes me sad. I sew to wear, not to shove in a drawer!

As I mentioned last week, I got very excited about the notion of sewing a bra made with foam cups, which are the sort I always buy, and speaking to Kellie at The Sewing Chest, she got me all set up with the right bits to have my first go. I made a toile using her purple hearts foam cups over the weekend and the fit is so good I wore it all day Sunday and now again Monday!

I started the process by making a rigorous comparison of the Kwik Sew 3300 pattern vs two RTW bra backs and ended up drafting a back similar to a Ted Baker one that fits me well.

Here you can see the difference between the KwikSew back (in brown) and my newly drafted-from-RTW back (in white) –

The Motherload of KnipMode – Part One

About 8 months ago, I got an awesome email from FehrTrade reader Hilde asking if I’d like her mom’s stash of KnipMode magazines from 2005-2007 as she wasn’t really using them much any more and they both thought I’d give them a good home.

Would I??? Omg.

So therein started the logistical planning to transport a rather heavy stack of magazines from The Netherlands over to London… Around this time we thought we’d be driving navigation equipment over to northern Holland in preparation for a neighbour’s North Sea crossing, so we’d make a detour to Hilde’s, but logistics didn’t work out and we weren’t needed for the neighbour’s barge anyway. And then, in a fantastic twist, a few weeks ago Hilde told me her sister lives in London and brought the stash over in her suitcase for me! So I only had to make a 10 minute walk from my office to her sister’s flat (seriously, what luck that she lives so close!) to pick up the magazines and thank her profusely for lugging them in her suitcase.

And for the past fortnight or so I’ve been absolutely pouring over them, picking out my Must Sews, investigating tiny design details, and noticing what changes Knip have made in the past 5 years.

There were too many for me to scan in one session, so here’s my picks from the early half of the stash, with Part Two to follow next week!

KnipMode 11-2005

OMG Lingerie!! I have already got the most perfect fabrics in my stash to make the camisole with the bra cups – the olive green stretch lace I bought in Paris coordinates perfectly with a teeshirt I got free with a magazine but was comically tiny (what percentage of the UK female population has a bust smaller than 27 inches? Seriously.). I think there might be enough to do the cami with a bit of the teeshirt’s sleeves left for a thong gusset. And you know how much I liked the KnipMode lingerie pattern I already had

Racy lacy lingerie set

When fellow blogger Sigrid visited me last May, she brought along a birthday gift for me – a fantastic lingerie kit from Kantje Boord (a big lingerie notions shop in Amsterdam), full of really cool goodies you only ever see on high-end RTW underwear. In fact, it was all so nice that I was hesitant to cut into it as my bra-making skills are not quite as polished as the rest of my sewing yet.

But Pattern Review are having their first-ever Lingerie sewing contest, so that gave me the impetus to cut into the kit!

I planned on making the same partial-band, underwired bra I’d sewn once before (twice if you count the muslin) with a few improvements, plus my TNT thong panty from KnipMode, and, as it turns out, I was able to squeeze a camisole out of the yardage included in the kit, too!

Camisole

We’ll start with the largest item first, even though I made it last… This one was really easy – I started with a RTW knit vest (tank top if you’re American) that I really liked, laid it on my fabric and traced the front, then did the same with the back.

A Yellow Lace Marlborough bra (that fits!)

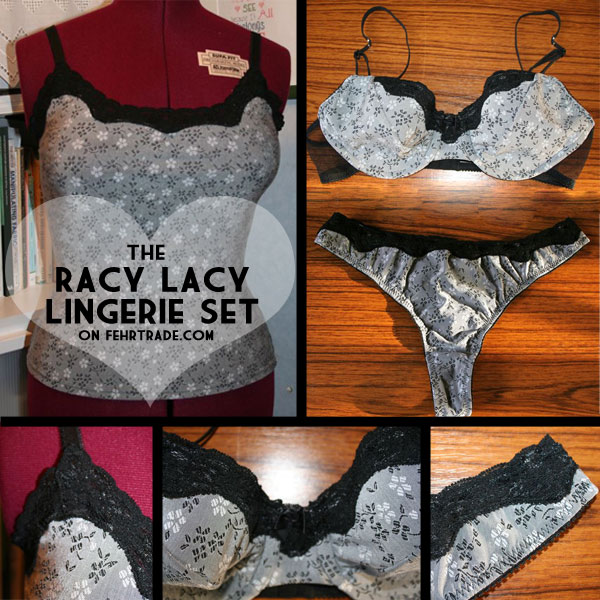
I have a long and rather conflicted history with bra sewing. I sewed my first bra five years ago, but despite being an accomplished seamstress and having a really standard body shape, I still haven’t managed to sew a single bra that I’m happy enough to wear on a regular basis in the time since.

Until now.

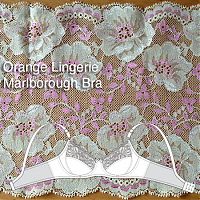
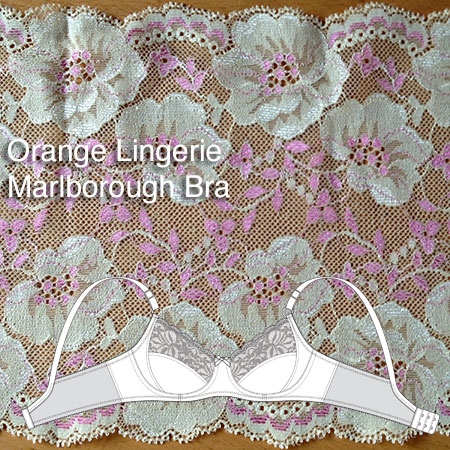
I knew Orange Lingerie had a bra pattern in the works for the better part of a year, and I knew her bra construction book was awesome, and, when I met Norma on her trip to London last year, she gave me bra fitting advice in a restaurant toilet – and still when she finally released the Marlborough bra pattern I was skeptical. That’s just how burned I’ve been by bra patterns in the past.

But I eventually did break down and buy it, with the thought to throw out all my other tweaks, calculations, traced RTW pieces, and just start fresh with this pattern and see where to go from there.

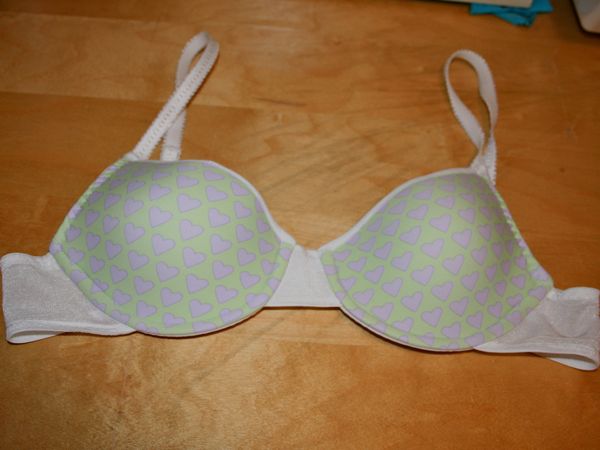
Choosing a size was actually the most difficult part for me – despite being a 34B in pretty much every RTW bra brand ever, the different formulas used to calculate bra sizes online are insane. Various calculation methods have said I’m anywhere from a 40A (Orange Lingerie’s method) to a 34DD (Bra size calculator’s method), both of which are just laughable (and yes, before you tell me to go get sized in person, I’ve done that in the past, and they said I actually am a 34B). So I threw both out and just made my RTW size, a 34B, with no changes.

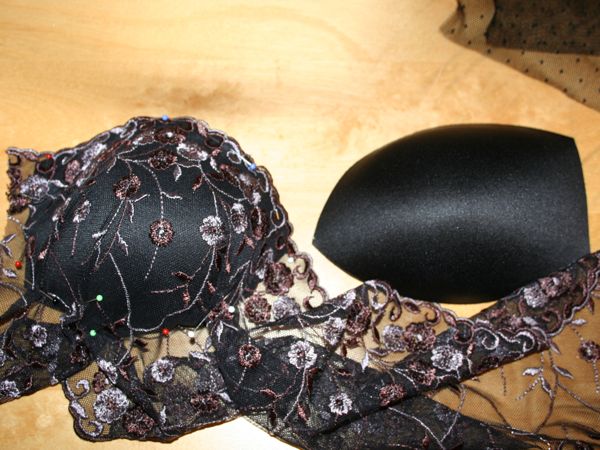
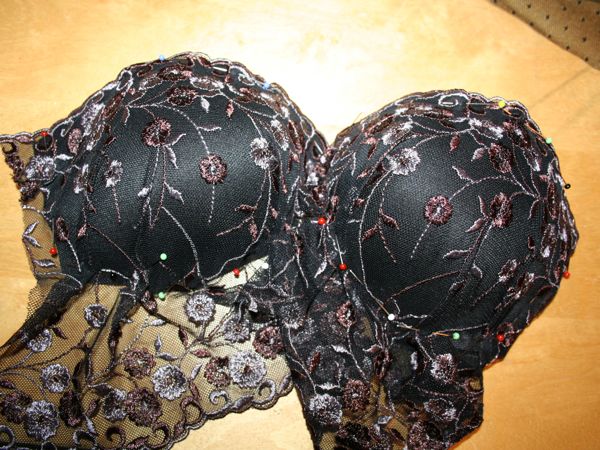
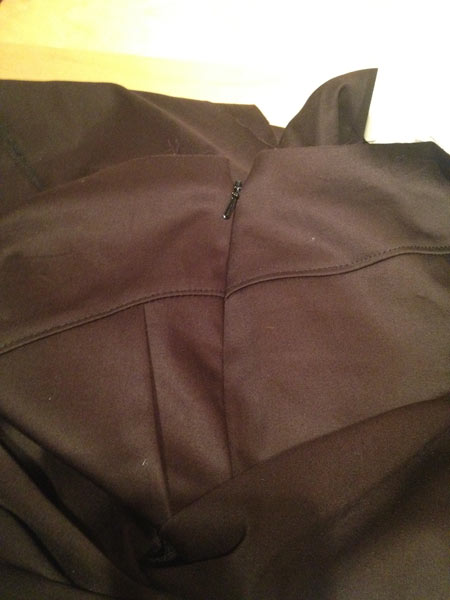
Before cutting into anything good, I first made a black test version – it’s unlined with unfinished edges, with various bits cut off of old RTW bras, and “plunge” underwires that were a bit too short. But it freaking fit.

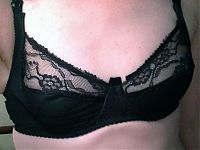
I wasn’t about to get too excited (I’ve been down that road before, declaring I’d perfected bra fit, finally, only to have problems emerge over time and wear). So I wore it for a week or two. And it still fit well. So I cut into the good stuff.

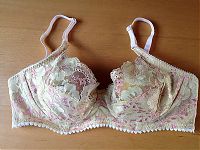
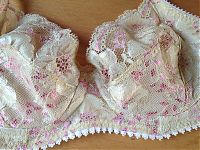
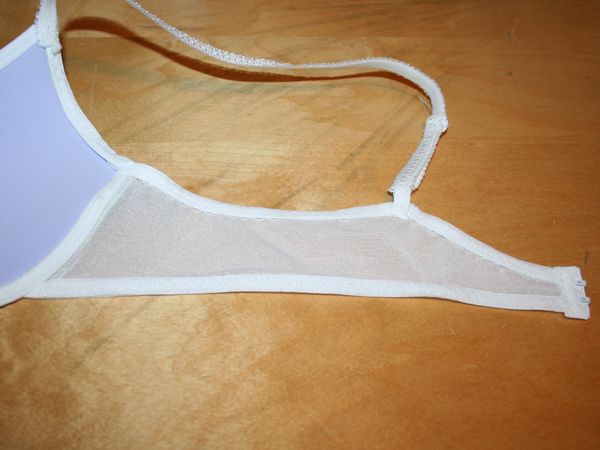
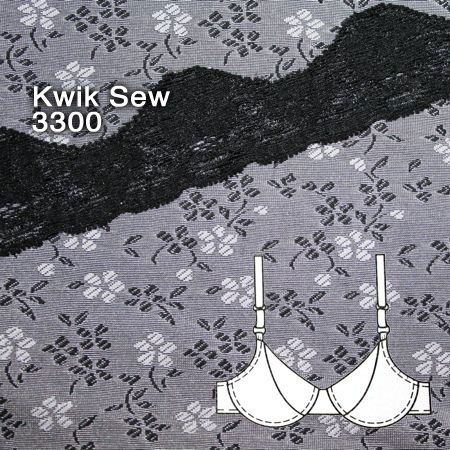
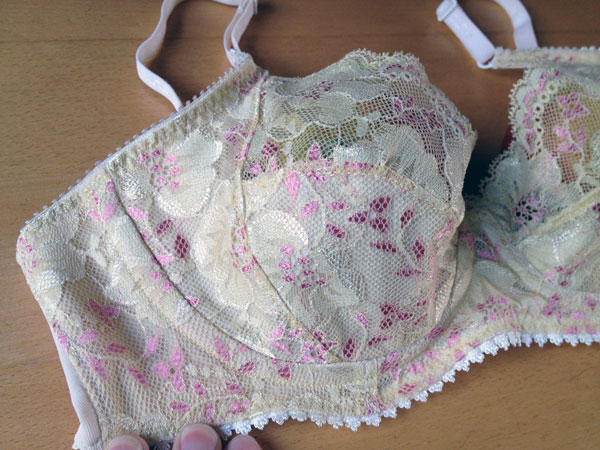
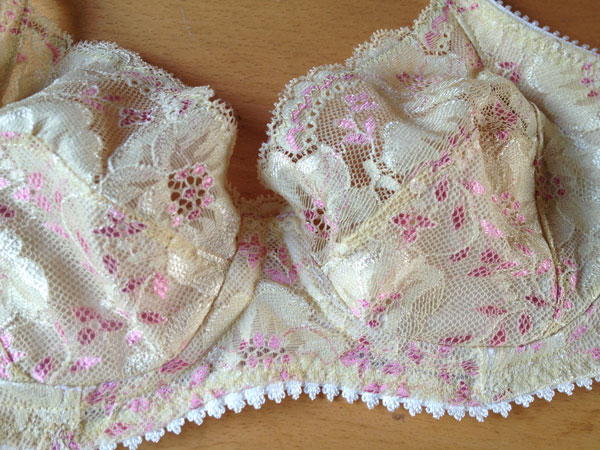
Everything in this pale yellow version is from my (rather extensive) lingerie sewing stash, and I hadn’t remembered until afterwards, but this gorgeous lace was actually a gift from Norma herself, when she came to visit London! You may notice that my straps have an M&S lingerie brand on them, even. Yes, I definitely recycle when the RTW parts are nearly-new and save me some time!

Too cold for photos – just sewing instead!

As I write this, London is in the midst of the second snowfall of the year (if you count Monday’s over-hyped yet under-delivered snow, that is) and I’m bundled up in a full-body thin layer of silk (long johns), plus my wool foldover trousers, my bamboo turtleneck, two pairs of socks, and my Russian greatcoat for my 35min walk into work today. It’s nothing on the Pennsylvania winters I grew up with, but at least I feel prepared!*

The good news is that, while it’s freezing outside, my sewing cave is one of the warmest spots on the boat, so I’ve been busy!

Papercut Peter & the Wolf Trousers

The new trouser pattern from Papercut Patterns was burning a hole in my To Sew list, so I just had to try them out! I finished these before last weekend, but Saturday I was covered in mud (another cross country race) and Sunday it was freezing and I didn’t fancy a photshoot.

I did an awesome job lining up the seams on the side invisible side zipper, if I do say so myself!

I really like that they have you topstitch all the mid-leg vertical seams as well as all the yoke seams – that topstitching really makes the seaming stand out nicely. It also meant I actually finished a huge 1000m spool of black Gutermann thread! I thought those things were infinite!

I’ve not yet worn these to work (the tulip hems mean my long johns are visible in front, the horror!) but I can tell already they’ve got a nice fit throughout – I especially like the trouser hems and the hip yokes, though they do mean the pockets are placed further down the leg than I’m used to…

I’ll try to get some photos this weekend, even though the details will be lost in the dark brown stretch twill (hey, it was in the stash alright!?) I’d bought in Paris last Spring. I didn’t have any particular attachment to it and it was a stretch woven as per the pattern requirements, so I made these as a trial version (or wearable muslin if you prefer). I might fancy making these again in some stretch wool suiting in my stash from last winter…

Another Chic Sweatshirt

When my parents were visiting in October, my mom looked through all my recent makes and decided she’d like a chic sweatshirt for her belated Christmas gift, and she picked out a lovely lavender sweatshirting for it while she was here. Remember how lovely she looks in lavender? I think it was a great choice. For my gift, she re-taught herself to crochet and made me a wonderful hat in mustard wool I picked out. Hooray for our little skills exchange!

I'm currently excited about…

My turquoise and silver motif dress is nearly done (check out the fantastic lace hem tape I found in my stash to pretty-fy my hem, too!), but it doesn’t stop me thinking ahead…

  • Lekala 4020 – My brain needs a quick knit top, and I looooove the cowl neck and shoulder yokes on this. I’ve created echoing sleeve bands on the back to decrease the “coffin back” look (the only reason I haven’t made their “S dress” yet is that I’m contemplating how to jazz up the back on it. Any ideas?). I’ve got some small lengths of silver silk jersey left in my stash that I think will find a good home in this top.

    Even better is that they’ve got every pattern available in a free size 44 pdf this month if you want to try them free before you do the custom-size thing!

  • A foam cup braOMG I am amazingly excited to learn there’s a pattern out now for making the type of bras I buy in RTW with the moulded, foam cups! It’s the Pin Up Girls “Amanda” bra pattern. I’ve made bras before, but I’ve never been happy with the fit, and I think that half my problem is that I’m trying to sew the kind of bras I never actually buy…

    I had an email chat with the lovely Kellie, owner of The Sewing Chest shop (the best UK source of elastic and boning and lingerie fabrics, hands down!), and I’m now totally excited about sewing bras again. She’s advised me to put some of her foam cups onto the non-cup parts of the KwikSew 3300 bra I’ve made before, and see how that goes. She’s also advised me to use a different underwire size, too. Fingers crossed for bra success!

Pre-Christmas prep

Are you ready for some random sewing goodness? Let the randomosity begin!

  • When I was at the bookstore on Brick Lane buying James’s birthday card, I couldn’t resist this reusable wrapping paper (okay, it’s just fabric to me and you!) with London streetsigns. I love that it’s a London fabric without being OMG UNION JACKS THE QUEEN TOWER BRIDGE! I figure I could use it as a lining like I did with that Japanese tea towel and my bolero jacket a few years back…

  • We were supposed to meet up with Pip and her boyfriend two weeks ago to celebrate Christmas, but we had to reschedule due to my swine flu, so I’m only just now able to sew up her present – a Nairobi bag made up in gorgeously soft red wine leather, bought in NYC from Global Leathers (I find it interesting that Americans would call this colour “burgundy”, whereas in the UK it’d be “claret”). I’m about halfway done and already I can tell she’s going to love it!

Marni silk blouse – muslin cold feet

In light of NancyK’s conclusion that KnipMode designer knockoffs aren’t as thoroughly tested as the rest of their patterns, I decided to make a muslin of the KnipMode August 09 Marni catwalk blouse before cutting into my nice teal silk satin (charmeuse).

Only now that I’ve got my bedsheet muslin done, I’m unsure about whether I like it or not. Now, you do have to use a bit of imagination here to block out the busy bedsheet prints (in reality, it’ll all be one solid teal colour, plus collar and cuffs):