Beforemath & Aftermath sewing

Thank you all so much for your sympathy and condolences and kind thoughts regarding Bosco’s sudden death. Last week was one of the worst of my life and I’m sorry to say that his departure was only one of a long line of awful things which happened to myself and those I love, so please bear with me while I piece things back together. I’m going to be more fragile than usual for a while.

In an attempt to clear the slate and document some blogging-accumulation guilt, here’s a catchup on the sewing-related events over the past fortnight…

Montreal

I was in Montreal for a few days for work immediately after my birthday, and I managed to shoehorn a very brief visit to Suzi Spandex into my 18 hour work days (in preparation for the launch of Zik.ca – Canadians, go see what I’ve been slaving over for the past 9 months in my day job!).

The shop itself was a bit of a PITA to get to – it doesn’t look far from downtown on the map but was a metro ride + 15-20 minute walk through a really dull neighbourhood, and I’m glad I had the address because the setup was very much like the NYC Garment District – an unmarked, nondescript office building with their premesis several floors up, with a front office and enormous warehouse full of rolls of fabric.

The setting may have been sparse, but I got such a warm welcome and the lady really helped me to choose the best wicking exercise fabric, which by all accounts seems to be their version of supplex, “Suziplex”.

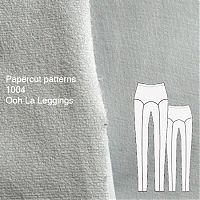
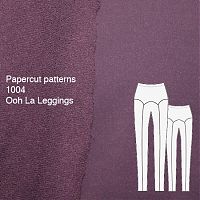
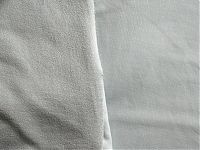
It’s got a great hand and recovery, and fabulously soft inner, loopy side:
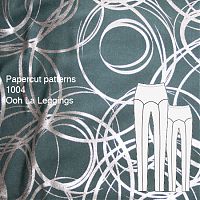
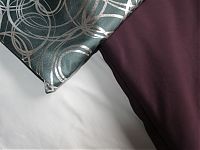
I bought 2m of dark, muted purple and 1m of pale grey Suziplex, and then another metre of some muted turquoise lycra with silver foil swirls.

Sewing through exhaustion

Apologies for sporadic posting, but if you’re following me on Twitter, you’ll already be aware that I’ve had an awful cold/flu for the past 15 days now. F-i-f-t-e-e-n days! It started with a sore throat, then incredibly running nose and lethargy now for the bulk of it, and it’s just not going away. I’m sleeping 12-13 hours a night and still needing naps, and the hospital say it’s definitely viral and there’s nothing to be done but wait it out. I have no idea how long it’s going to last, as I literally feel no improvement now than when I first picked this up. I’m really just giving you these details because like half of London has it right now, so I’m hoping someone will tell me how long I can expect it to hang around (and also, expect all the Olympic visitors to bring it back home, cheers!).

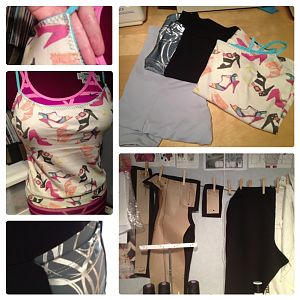
So in the few hours where I’ve been strong enough to sit upright and not actively be sleeping or working, I’ve finished a few bits of sewing, but I’m in no fit state to model them, so for full photoshoots you’ll need to wait a bit longer:

An epic and nonstop September Roundup

Posting was a bit light around here in September, but not intentionally so. Coming back from Argentina immediately into building work (which pretty much occupied every morning, most Fridays, and some evenings too) and being away every single weekend in September just left me flattened. A month on and I’m still exhausted, and frankly, trying to figure out if I’m ill, or if it’s diet-related, or just a really slow recovery from international competition.

So I must apologise to all the people out there who are waiting on emails from me – when I’m too tired to sit up, I don’t tend to open my laptop to write out proper replies, let along blog posts (this one has taken me about 4-5 sessions spread out over a week to write). But I did manage to get all the Sewing Indie Month posts together that I needed to, and I wanted to gather them together along with a bunch of other bits and pieces you may have missed if you’re not following me on Twitter or Instagram.

Imagine Gnats Wrap-style Bess top Tutorial

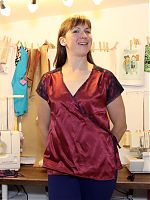
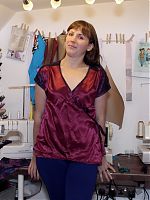
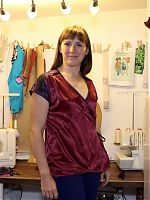
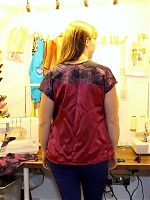
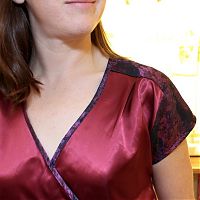
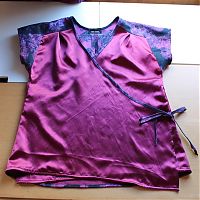
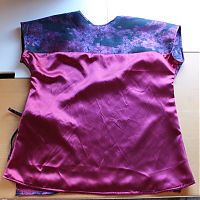
One of the few finished garments I managed to make in September was a fancy, wrap-style hack of the Imagine Gnats Bess top, which I wrote a full tutorial for, too.

I loved the shoulder detailing on the original pattern, but I thought the shoulder seaming looked reminiscent of kimonos, so I changed the front pattern piece to be a wrap-style instead.

But the fabrics in my stash that went together best ended up being a brocade skirt that my friend Pip gifted me after she lost weight, and a poly satin that (I think?) a neighbour gifted to me years ago, so this ended up being a refashion project, too!

Anyway, you can read more about it over at Imagine Gnats, and last week I also wrote an Activewear patterns roundup for Rachael, too. Definitely take a look at her shop while you’re over there – she’s a keen cyclist and has just taken delivery of a bunch of wicking lycra in some lovely colours (she’s US-based)!

Also for Sewing Indie Month, Maison Fleur interviewed me and asked a lot of interesting questions I’d not thought about before, which was nice! I may have also hinted about a few big things happening in January, which will also coincidentally start my 10th year of FehrTrade.com!

Seamwork Radio

It’s no secret that I’m a big fan of Seamwork magazine, having subscribed from the very first issue, made quite a few of their patterns, and written a bunch of articles for them, so I was literally dancing at my desk when the first episode of Seamwork Radio was released last week!

Happy 2013!

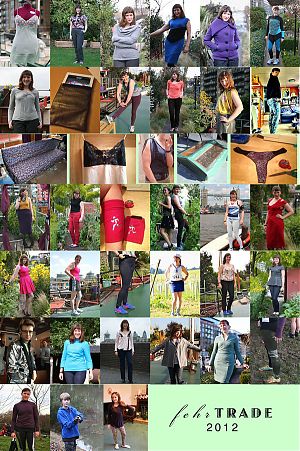
As is traditional, I like to take the first of a new year to take the opportunity to look back on what I’ve sewn in the previous year. So without further ado, here’s a visual reminder of 2012!


Click the image to see it better, or right-click here to see it in a new tab to get a better look!

Tip: If you’d like to skim back through the posts for the above projects, you can click Gallery in the upper left menu, which will only show you finished projects, without all the magazine reviews and in-progress reports getting in the way!

By a mere glance at the collage, it looks like I’ve sewn less this year than in past years, but really I just became more efficient with my photoshoots and so most of the photos contain more than one garment! That, and there were a few that weren’t properly documented, oops.

The Year in Stats

In terms of pattern companies used this year, I made: 11 Burda magazine (more on that in January as I finish up my Year of Burda), 6 Papercut Patterns, 5 Jalie, 4 Pattern Magic, around 4 self-drafted, 2 Manequim magazine, 2 Young Image/My Image magazine, 2 Pattern ~ Scissors ~ Cloth, and one each from: Lekala, Simplicity, Vogue, So… Zoe, Christine Jonson, Wiksten, and KnipMode (oh how the once-mighty have fallen!).

By my count, I made: 19 Tops, 15 pairs of Trousers, 4 Dresses, 4 Skirts, 3 Coats/Jackets, plus two slips and a handful of pairs of panties, an iPad cover, some running armbands, and a boat skylight cover!

But the biggest number of them all – 21 of the above were for running! omg.

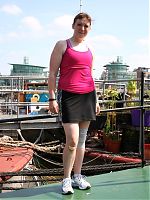
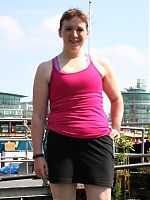
My first running skirt

This is definitely turning into The Year of Lycra for me, and it’s barely halfway finished, so I hope you’re not too bored yet (wonderfully, I’ve even inspired some of you to start running Running has been a part of my life for about 8 or 9 years now, but training for a marathon is now really upping my enthusiasm to sew cute clothes for the approx 5 hours every week I’m actively running (wow that’s a lot!).

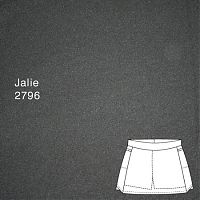
I’ve had the Jalie multisports skirt (2796) pattern in my stash for several years now, but English summers are never particularly hot anyway, and I usually run in the early mornings, meaning it’s rarely too warm for running tights. But I’ve got some mid-day races coming up, and sometimes it’s warm in the evenings for Run dem Crew, so while I was ill in the latest bout of hot weather, I made up what will be the first of many running skirts!

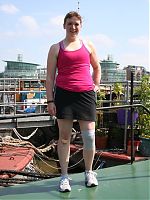
There’s lots of mix & match options in this pattern- briefs or compression shorts on their own (with either wide or narrow waistband), or you can have the skirt with either briefs or shorts underneath (again with either a wide or narrow waistband). I do not run in shorts normally (or wear them outside the boat, to be honest) but I went for the shorts under the skirt, with the wide waistband.

I’ve loved every single Jalie pattern I’ve ever sewn, and this is no exception. They’re fantastic to sew, but what keeps me coming back is that these are equally fantastic to wear – Jalie totally “get” exercise gear.

The pattern itself is great – tons of sizes, great instructions (I love that they’re available as pdfs so you can view them on your computer or tablet, though I used Jalie’s excellent iPhone app to read them this time around). They’ve really thought about how they’ll be worn when moving, too – the constructions steps mean that seams that might chafe are concealed as much as possible.

My Olympic leggings

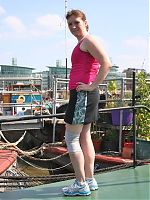
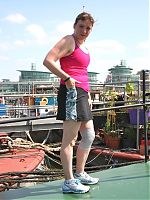
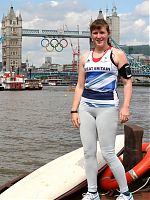
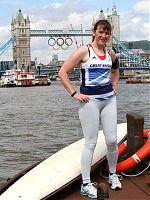
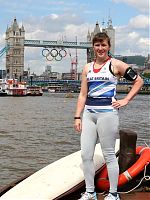
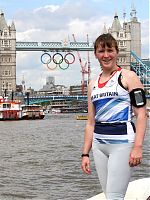
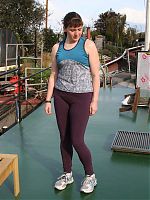
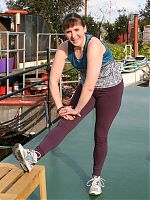
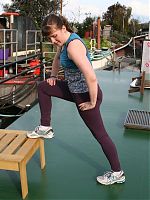
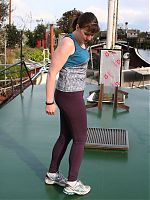
On Saturday I showed you a sneak peek of my new running leggings and my thoughts on the Opening Ceremony, but here’s your chance to get a better look at them, and those Olympic rings on Tower Bridge!

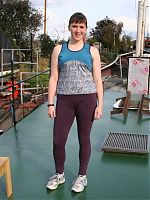
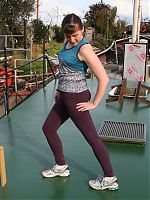
I’m finally feeling a little better so we took these photos after I ran my usual 10km loop in my official Stella McCartney for Adidas replica Team GB vest (now sold out everywhere now, sorry!) and my leggings.

This is the 4th(!!) time now I’ve sewn the Papercut “Ooh La Leggings” pattern (UK stockist here), though I’ve actually got a 5th pair on the way, if you can believe it! They’re so well drafted, so stylish, and so comfortable to run in that I just can’t resist making more. That they’re also really quick to sew on my overlocker is just a bonus. Here I made them in the pale grey Suziplex fabric I bought from Suzi Spandex when I was in Montreal in March, and it’s just truly, truly wonderful stuff.

I also used my my elastic waistband tutorial technique for a nice, comfortable finish inside, which, judging by your comments, a lot of you are also using now, hooray! This waistband plus the soft and loopy reverse side of the Suziplex really does make for the most comfortable running gear ever, aeons better than anything I’ve ever bought.

The Liberace Leggings

Viewers of a gentle, tasteful disposition, you best look away now…

My previous pair of purple leggings are my FAVOURITE running running bottoms – so wonderfully comfortable, and the natural waist means they don’t shift around a bit as I run. They’re so comfortable I actually raced in them the other week (and any runner will tell you that if you have any doubts whatsoever about your kit, you don’t wear it on race day!).

So after a full day of finishing up the Run dem Crew refashion challenge, plus finishing up a skirt, I found myself with a few hours and an inexplicable desire to sew up another Papercut “Ooh La Leggings” pattern (UK stockist here) in the audacious lycra/foil in my stash:

I bought this crazy-ass fabric at Suzi Spandex when I was in Montreal, 80/20 nylon/lycra mix, which they call “Spirographix” (mine’s the charcoal colourway, though it’s much more teal in real life). The hand of these feels quite “leotard” or “costumey” really, but it’s fine for short bursts of exercise IMHO. Certainly nowhere as nice as the Suziplex I bought, through strangely 50% more expensive. Go figure.

Sequin running vest and purple leggings

I’m going to break from tradition here and actually post my next two outfits out of sequence from when I made them, mostly because I just shared my elastic waistband tutorial with you, but also because I’m really freaking excited about sewing exercise gear right now. Honestly, it’s starting to become nearly lingerie-levels of hysteria with me – super quick to make, easy to fit, and lots of wild colours and patterns in small doses! But you’ll get to see my “civilian” top and trousers later this week, so no worries if you’re starting to glaze over at all the lycra…

For this set of running gear, I’ve paired up the Papercut “Ooh La Leggings” pattern (UK stockist here) with my self drafted knit block (from Metric Pattern Cutting). And in the case of the top, I altered the seam lines and armhole shape to suit!

You may remember the ex-Prada sequin trompe l’oeil fabric from a few years ago when I used it to make a cowl top. I wear that all the time, but I only had a small piece leftover in my stash, and it was far too lovely to throw away. But with a bit of creative thinking, it was enough for this! Though I think I’ll lower the curve a bit for my next running vest so the peak is just at my underbust…

As you can see with the leggings (or maybe not, the purple fabric is quite dark!), there are no side seams here! The shaped front and back yokes give some really cool, curved seams, and they merge nicely into front- and back-leg seams instead.

A better elastic waistband finish – tutorial

While I await a photoshoot on my new Papercut Ooh La Leggings, I thought it’d be nice to share with you what’s become my go-to finish for elastic waistbands. Oftentimes pattern instructions will tell you to create a casing, leave an opening, and thread the elastic through it. I totally hate this! You end up with uneven bunching of fabric, plus the waistband tends to fold up and twist and generally get really uncomfortable to wear.

Over the years, I’ve developed this method which a) attaches the elastic directly to the fabric, and b) protects your skin from direct contact with the elastic. I find it’s much more comfortable than the casing method, looks much neater, and also gives you the added option to have greater stretch in the back if you need it (swayback/bootay ladies, listen up!).

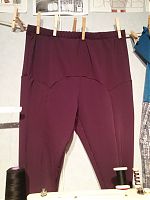
Finished leggings:

Step 1


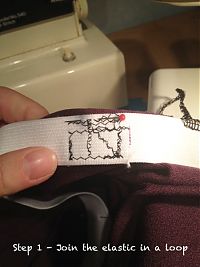
Step 1 – Place the elastic around yourself where the waistband will lie, making sure it’s snug, but not tight (you may want to pre-stretch the elastic a bit first). Mark the overlap edges with a pen, and trim so the edges overlap by an inch or so. With your sewing machine, zigzag the crap out of it so it’s not going anywhere!

Step 2


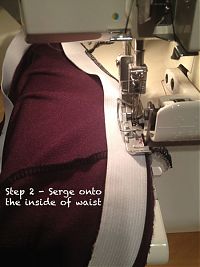
Step 2 – Make the overlap the Centre Back, and mark the opposite side with a pin as the Centre Front. Mark midway between these two with pins as your side seam marks (or offset towards the CB if you want more stretch in the back). Place your elastic against the inside edge of your waistband, and serge/overlock the elastic in place, taking care to not cut the elastic with your serger blades! If you don’t have a serger, that’s cool, just sew near the top edge of the elastic with a narrow zigzag and very short stitch length. Stretch the elastic as you sew/serge so all your pin markings line up.