My bias silk 40th birthday gown

Happy 40th birthday to me! Since it’s a big birthday year I kinda felt like I just had to celebrate big, too! So we rented the whole of a private members cocktail bar near Kings Cross, invited a bunch of people, laid on pizzas, and let the rest just happen! Every year I like to make myself something special to celebrate my birthday, and I felt like I should sew a big, glamorous dress for myself to feel like a total star at the party, too.

I happened to have four meters of gorgeous copper-coloured silk satin (charmeuse) in my stash which I’d bought from Truro Fabrics back in 2015 with the intention of sewing a gown for the World Transplant Games gala dinner in Argentina. But I didn’t quite have enough time to sew it before we left, and the silk has been in my stash ever since. I still had the receipt in with the fabric, too, and the price reflects the incredible quality of this silk – I’d paid about £75 for it.

Burda magazine March 2017

Springtime in Burda’s world means the start of wedding season, and the March issue is traditionally the one filled with wedding gowns and other formalwear suitable for bridesmaids and guests, too. I’m personally in the market for a gown to wear to a gala event in June, so perhaps something will take my fancy here…?

Vintage silk roses for a wedding bouquet

The main reason for our recent trip to the States was to celebrate my Aunt’s wedding, and since I still had some scraps of my grandmother’s (her mother’s) gown leftover from when I refashioned it into my wedding gown back in 2010, earlier this year I offered to make her something from the silk so that her mother could be a part of the day, too.

I thought perhaps she’d want a clutch bag, or cropped jacket or something, but she requested fabric roses instead. And a lot of them!

I made my own “pattern” so all of the roses would be the same size, but the pattern was really just two different sizes of pointed ovals. To make each rose, I just folded the oval in half lengthwise and gathered together the cut edge by hand with some running stitches. I rolled up the larger one, tacked it together at the base, then wrapped the smaller around the outside of it, and tacked that together by hand, too.

It took a few minutes to make each rose, so I made myself a little kit and tried to do one or two each lunchtime at the office (after I’d finished any messy eating!!).

And before too long, I had a whole herd of roses to post off to DC!

Then her florist used floral tape and wire to create “stems” on each and worked them into the bridal bouquet, the flower girls’ crowns, and the buttonholes for all of the men on our side of the family, including my granddad. Apparently as my Aunt pinned his buttonhole onto his label, she told him that the roses were made from Granny’s gown, and he was so touched he started crying!

Goodbye Granny

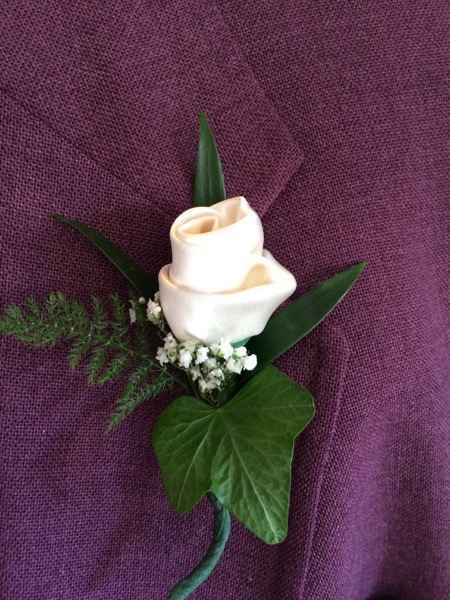
Sorry for the silence this past week, but I had to take an extremely-last minute, emergency flight back to the States last week to attend my grandmother’s funeral (as in “book me a flight for tomorrow“). Her last gift to us all was to prompt a family reunion, and I really felt strongly that I had to be there, so it was good to have some family time despite the circumstances.


Granny and I at our wedding reception in 2010

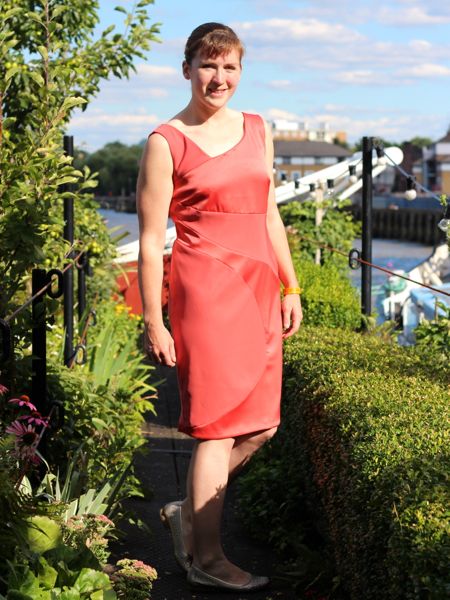
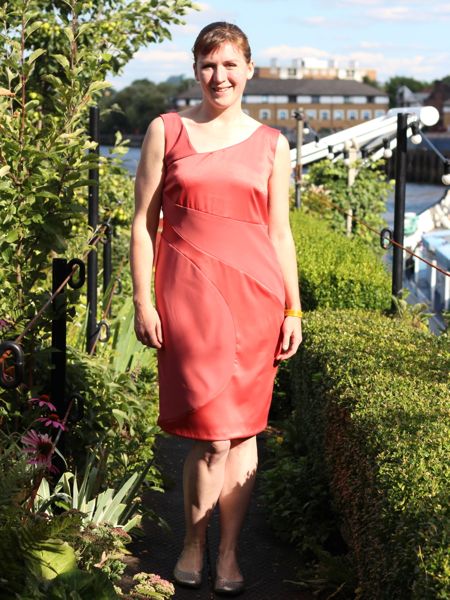
Granny has been in the background of my sewing for pretty much my entire life, but there were a few times when she featured heavily on this site, in particular when I refashioned her wedding gown into mine in 2010, but also earlier the same year when I made her a blouse from some vintage fabric in her stash (and which my mom said she was still wearing regularly right up until the end).

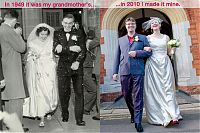
If you’re a new reader to this site and haven’t yet seen my wedding dress project, then really, I urge you to just stop for a minute, click through and take a look. Granny was so immensely proud that I looked so beautiful in “her dress” and she continued to show our wedding album to everyone she could. I had so many relatives come up to me at the funeral saying how much they loved that I turned her gown into mine.

Overall, this weekend really reinforced to me how much “making” is in my DNA – I knew Granny had been quite crafty, but I hadn’t realised that she was actually a seamstress in her early life before going back to school as a young mother and becoming an insurance underwriter. She continued to quilt and sew clothing throughout her life, but also knit and crochet, too. Happily, I was gifted a very modern-looking yoked cardigan that she’d knitted years ago (I actually wore it to work yesterday!) since I was the only one in the family it really fitted (ditto to a gorgeous pair of sage green leather gloves and an astonishingly beautiful vintage coat).


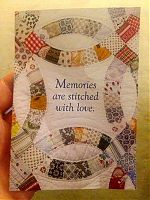
The funeral stationary was quilt-themed!

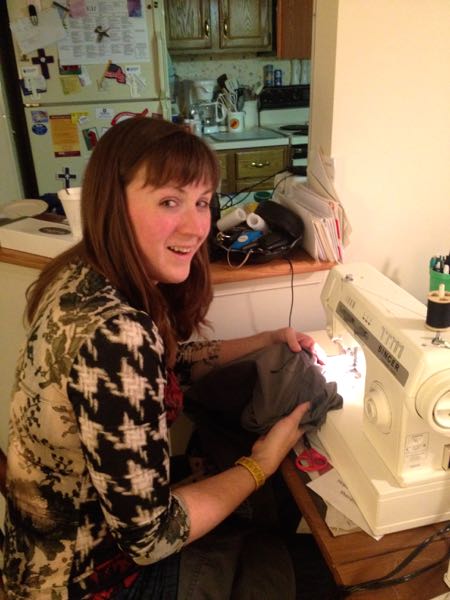
Over the course of the weekend, the family went through some of Granny’s most cherished items, and my granddad asked if I’d like to see her sewing machine. Of course I did, and before I knew it, I had it humming away fixing a tear on my sister-in-law’s trousers!

The Swirl Sheath Dress

This dress has been an awfully long time in the making. The idea started back when I took the Pattern Magic 2 class at Morley College last winter, where we learned a technique called “Fundamentals: Create three-dimensional forms with design lines only” (it just rolls off the tongue, eh?).

Essentially what this means is you sew up a muslin, draw design lines all over it, cut along these lines, then introduce snips of ease until the pieces lie flat, and there’s your new pattern! I did all this (based on a sheath dress from the June 2012 Burda magazine, which doesn’t appear to be on the US BurdaStyle, sorry) last summer, but then the project stalled when I couldn’t find any heavyweight stretch satin anywhere in Europe, and had to import this gorgeous salmon stretch duchesse from Gorgeous Fabrics.

Then there were further delays as I didn’t have a wide enough cutting table to lay out the asymmetric and strangely-shaped pieces, until a few weeks ago when the Thrifty Stitcher invited me to pow-wow at her studio and suddenly my swirl sheath dress was back on track!

Because all the darts from the original pattern (bar one) are now incorporated into a bunch of curved seams, this means there’s a lot of easing going on, so if you don’t like easing princess seams, for example, you really won’t like sewing this. My easing motto is “pin the crap out of it”, and I’m proud to say that I didn’t have any tucks or unpicking in any of these seams. Though I did use 58 pins on just the lower semi-circular seam!

A chic little… sweatshirt?

It’s not the first time I’ve done the “upmarket sweatshirt” thing before – some of you may remember my Haute Hoodie back in 2008, but I think this new take has got even less in common with the usual sweatshirt idea than my earlier one!

The pattern here is Burda September 2012 #106 but it’s also available as purchased download pattern, too. I’m really liking that the English BurdaStyle.com site is finally getting the magazine patterns up more quickly these days, sometimes even before my print edition arrives!

I bought this turquoise sweatshirting back in 2010 from Fabric.com and had my parents bring it in their suitcases when they came for the wedding – it’s so difficult to find sweatshirting in non-traditional colours here in the UK! I’m not quite sure why it took me so long to sew this, as I love the colour and the sweatshirting is really nice quality, too.

Happily, I finished sewing this just before we left for our week’s holiday in the Loire Valley, so you get to see this top in a French pastoral setting rather than the usual London maritime one!

Pick Three

If you had to choose three (and only three!) things you’ve ever sewn to best represent what you can do, what would you choose?

I’ve recently been tasked with exactly this, and I found it incredibly difficult to decide. I mean, it’d be difficult enough if I was confined to just one type of garment, like “Pick three dresses” or “Pick three casual garments”, etc, but just three, from the hundreds of garments I’ve sewn in the past nine years?! This required thought.

Pick One…

Having said that, strangely, the first of my picks was pretty easy – my Winter Coat.

I made this coat two winters ago and I’m really, really proud of the finish on it. The wool is extremely thick, with bound buttonholes, metal buttons, single welt pockets, a thick silk lining, and (most proudly for me) I didn’t use a single bit of fusible anything in its construction. I wear it to death in winter and I love everything about it.

Pick Two…

Should I play my trump card and pick my vintage refashioned wedding gown? Well, alright then!

Run dem Crew Refashions – Ladies first…

This is probably the longest-running project I’ve done since my epic wedding gown refashion, but I’m really proud of the results and the fact that I can finally show them off after much hinting and whispering round these parts. This would’ve never happened at all without the spark from Charlie, the founder of Run dem Crew (the Tuesday night running family that has utterly transformed my life in the past year I’ve been a member). When he found out I sewed, he raised the idea of a refashioning project, then proceeded to gather together all the pieces to make it happen.

The idea was simple – start with 19 pieces of running clothing – some used, some promotional, and some brand new with tags on (including some ££££ Gyakusou designer gear!), and refashion them.

I started this project back in April, but stalled during the 5 weeks our boat was in drydock and I was without access to my overlocker and sewing room. Happily, I got some fantastic help with ideas from fellow RDC runner Jennie, who’s worked for years as a product designer for a well-known clothing company, and came over to sift through the clothes and it really helped for me to bounce ideas off her and vice-versa.

So her reward was some enforced modelling when the project was finished! Ha!

From the initial bag of clothes, I made 8 garments – tops and bottoms for two ladies and two men. I’ve been promised some modelled shots of the men’s clothing coming up soon, but here are the two ladies’ outfits, modelled by Jennie and I….

I had the fore-thought to take images of all the Before clothing, so I was able to do a nice collage like this, showing you what the various pieces turned into:

Design lines and ideas

I know it’s a cliché to say so, but I’ve been very busy lately! So busy that there was no sewing activity whatsoever last weekend (though I did cut and fit an awful lot of insulation for the new boat bedroom, attended two out-of-town barbecues, and raced a new 10km PB in the weekend available to me!). In two weekends’ time I’ve got a friend’s wedding and ever since we were invited, I knew I wanted to apply a Pattern Magic technique onto a sheath dress for this occasion.

Overall, I was disappointed by the June Burda magazine, but I saw dress #129 and knew it’d be a great starting point since I know Burda’s dresses fit me very reliably (and I’ve already raised the waist by 1 inch to make it perfect).

The technique I’m looking to apply here is one I learned on my Pattern Magic 2 course at Morley College, though it’s well documented in the second book, too. Essentially, you make a muslin of a basic block (in my case, I’m using this Burda pattern), draw design lines wherever you like, cut along those lines, and then release any lumps into the curved edges of the new pieces.

So thus far I’ve copied the tech drawing off Burda’s site, raised the neckline a bit, and removed all the darts in Photoshop (since mine will be incorporated into my new design lines anyway), then printed off a bunch of these empty tech drawings onto a sheet of paper.

The Donna Karan red vixen dress (Vogue 1280)

I don’t often sew Vogue patterns, but I am a massive fan of the Donna Karan patterns’ design and execution, so it’s no surprise that I added Vogue 1280 to my Wish List the second it was announced recently!

Happily, my mom saw there was a pattern sale where she lives in the USA and offered to buy a few patterns for me at US sale prices – she paid less than half the price for the pattern + shipping to the UK than I’m charged just in postage to the UK for the same pattern! I wasn’t planning on sewing a dress right now, but I got so excited when I saw Vogue’s numbered pattern marks for the first time (possibly in response to my complaints regarding Vogue 1259’s instructions), that this dress moved quickly up my Must Sew list.

Like all DKNY & Donna Karan Vogue patterns, this one’s a great mind puzzle to put together! It also has the joy and wonder of looking like a total mess until the very end, when it all comes together into a dress shape. I found it to be true to size, so go with your measurements, not some vague idea that all Big Four patterns have tons of ease. Most of the pieces are cut on the bias (not that it means much in a jersey!), and it hugs the body very closely. If you’ve got any lumps and bumps, though, this is not the pattern to hide them, and so you’ll probably be wearing Spanx underneath in addition to the strapless bra the bodice requires (Full disclosure: I’m not wearing Spanx in these photos!).